If you are using Windows operating system, then this tutorial is for you.
How to ‘take a photo’ of the screen of the gadget you are using if you do not have another or separate camera with you? This ‘taking a photo of the screen’ is what we call screengrab, screenshot, or screen capture.
Here’s how you use the Snipping tool to take a photo of your screen or part of it.
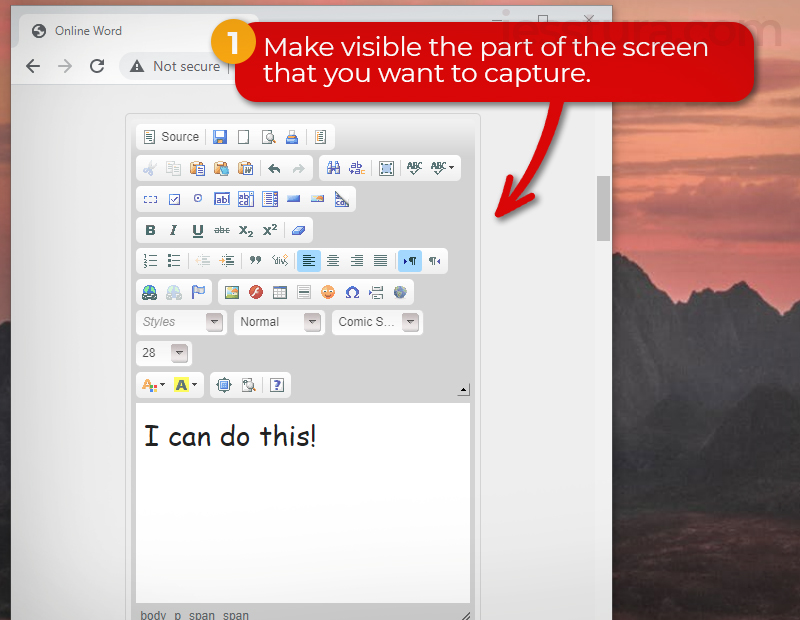
Step 1: Make that part of the screen visible.
Before you open the Sniping Tool app from your Windows computer, make sure that the screen you want to screenshot is ready and visible.
Below, I make sure that my work with wordonline.info is visible on the screen. That’s the box I want to ‘snip’ or screen capture for this activity.
Step 2: Click the Search Box and type ‘snip’.
Click the Search box in the Taskbar. It’s beside the Windows icon at the bottom leftmost of your screen, then type ‘snip’.
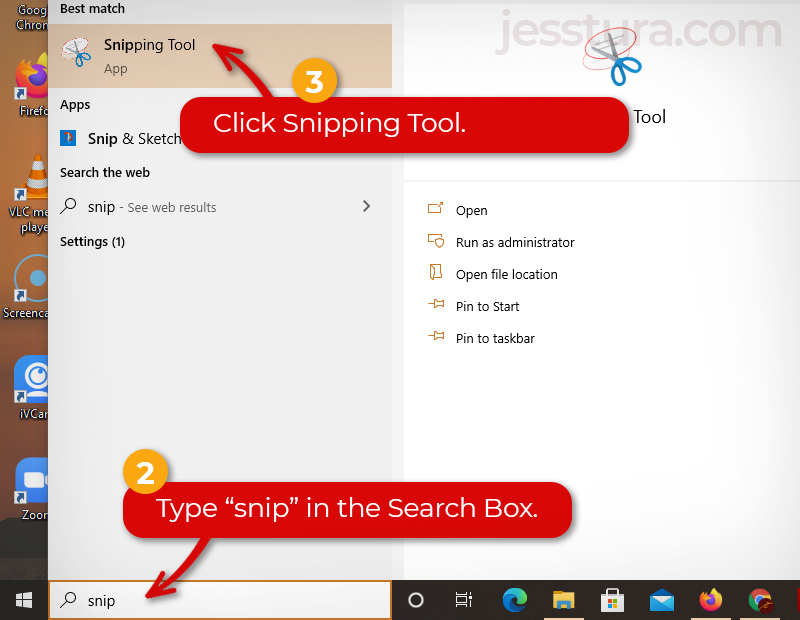
Step 3: Click Snipping Tool.
Step 4: Click Mode and choose Rectangular Snip.
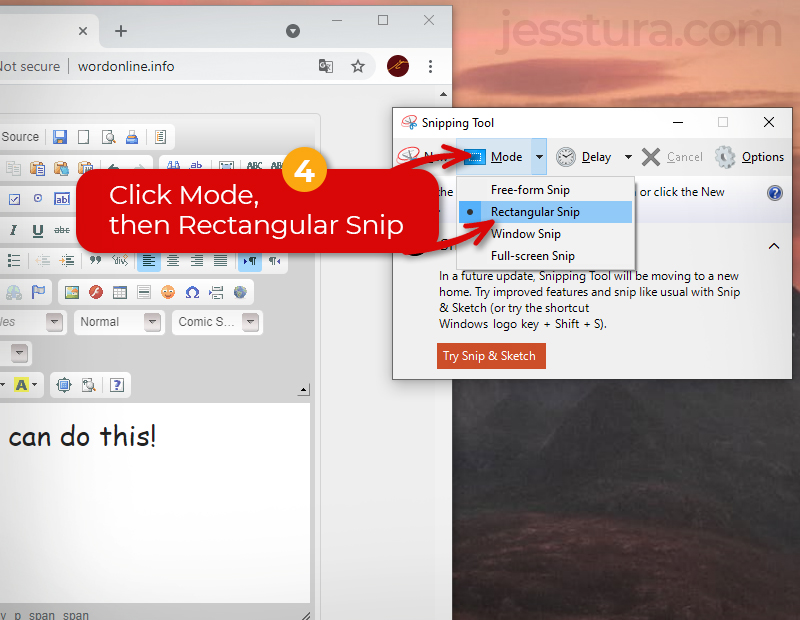
Your screen will turn to white-ish (semi-transparent white). Snipping Tool is waiting for you to drag your mouse to make a rectangle selection.
Step 5: Select the part of your screen that you want to capture.
Make a rectangle selection by dragging your mouse covering the part of the screen that you want to capture.
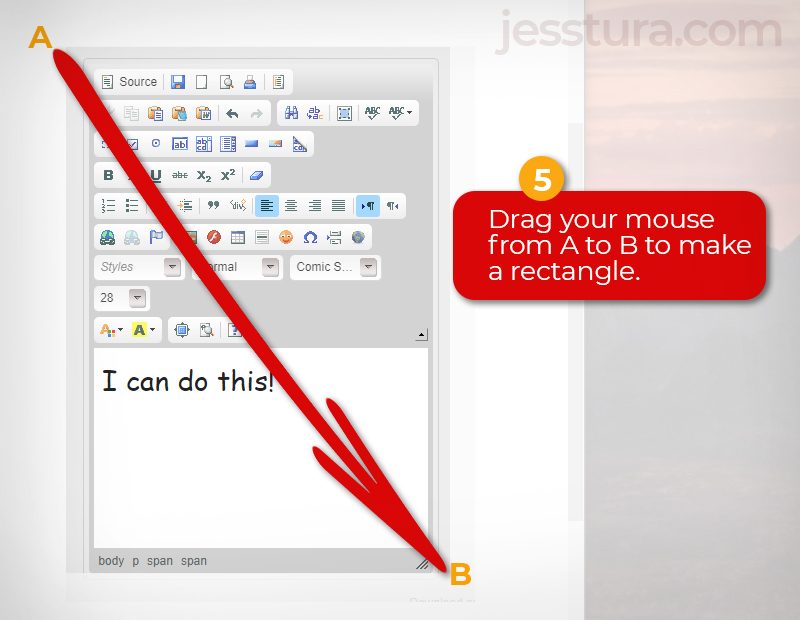
Congratulations! You just ‘took a photo’ of your screen.
Note: If you want to start over again, just press New button.
The next step is to save the screen you just captured.
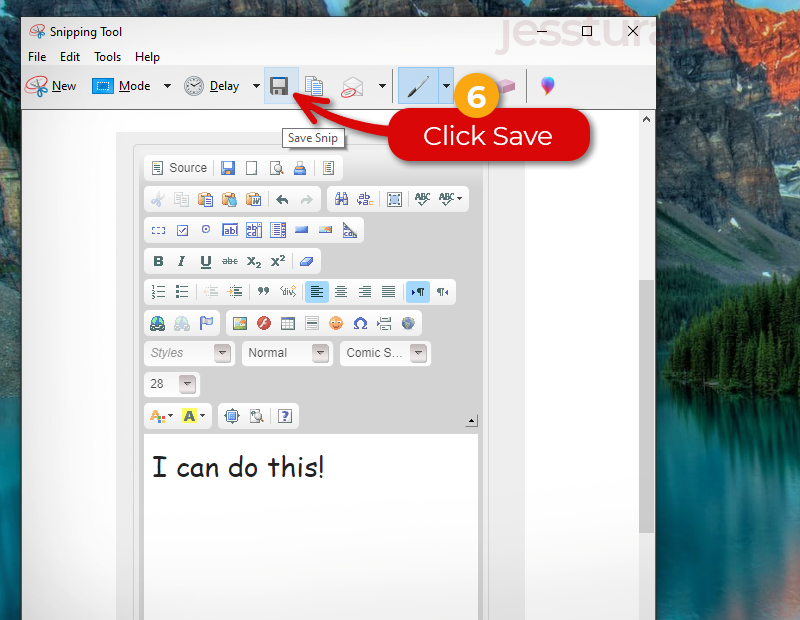
Step 6: Click the Save button.
Step 7: Write the filename, then Click Save.
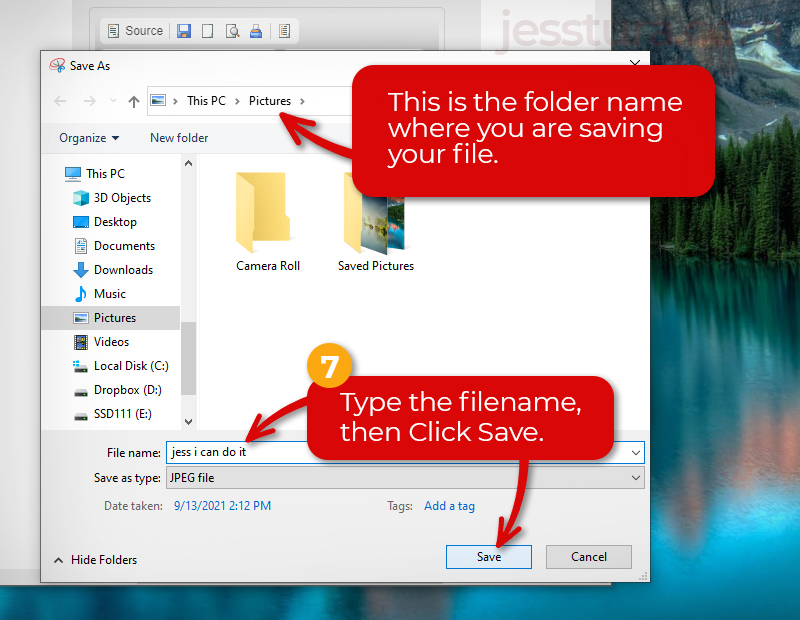
Take note of the folder name where you saved your work. In this example, we saved our file inside the Pictures folder. In some cases, the files are saved in the Downloads folder, or other folder. You have to know and remember where you are saving your files.
How to submit screenshot files on Seesaw?
Watch the video below to learn how to submit the screenshot files on Seesaw.