Logging-In into Pictavo
Get your username and temporary password from our Google Classroom.
Step 1: Open Google Chrome and go to pictavo.com, then click Login.
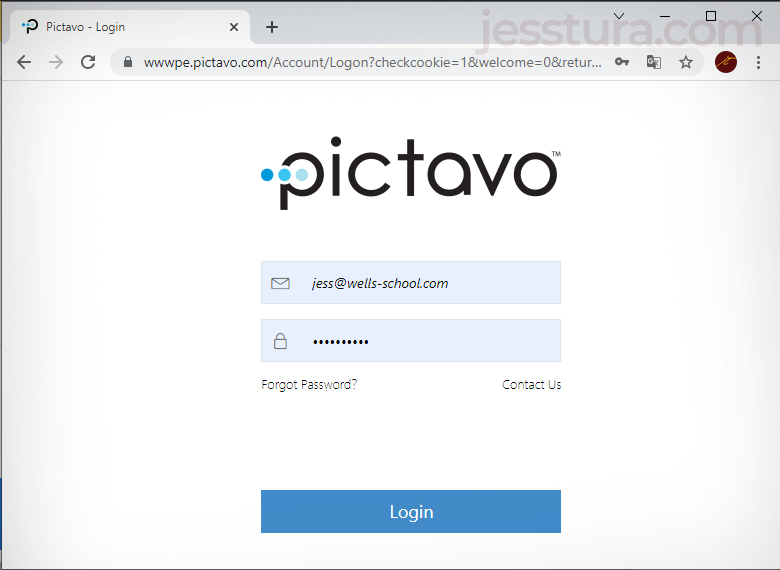
Step 2: Enter your username and temporary password.
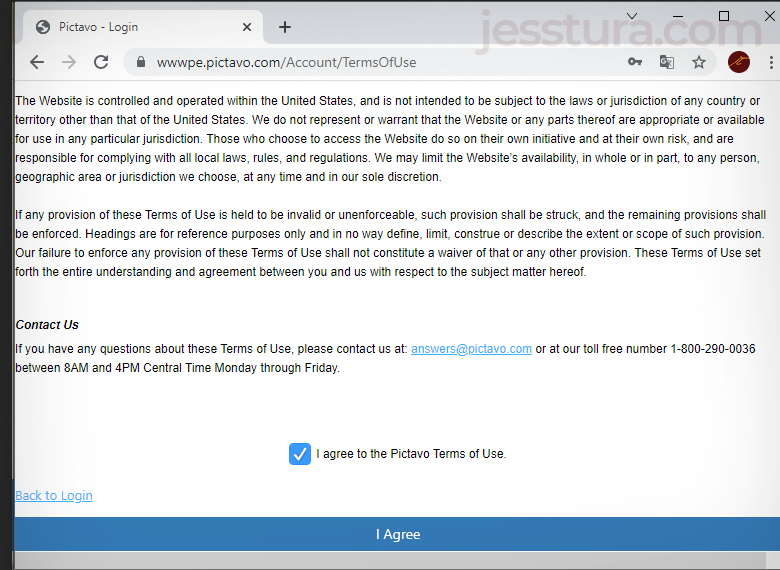
Step 3: Scroll down, tick the check box, then Agree with the TOCs.
You need to assign your account with a unique password. Any activity in Pictavo associated with your account is recorded; so you need to make sure that no one else is using your account except you.
Portrait Database
Portrait Database has all the information needed for a student such as the firstname, lastname, grade level (ex. Grade 11), and Homeroom section (ex. Grade 11B), and the portrait photo.
You will be assigned a grade level and section where you will put the students info in Pictavo. It is usually in spreadsheet, and you can get this from our Google Classroom as well.
Make sure to type the correct spelling of each student’s information.
To add student information in Portrait Database:
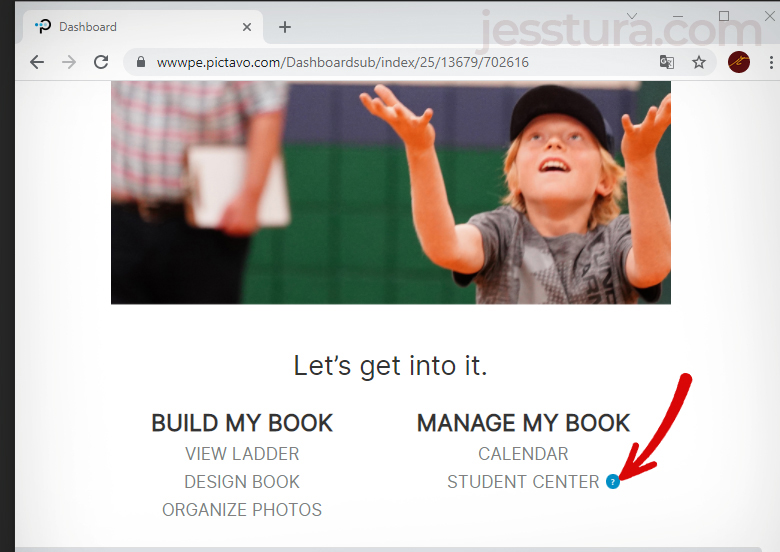
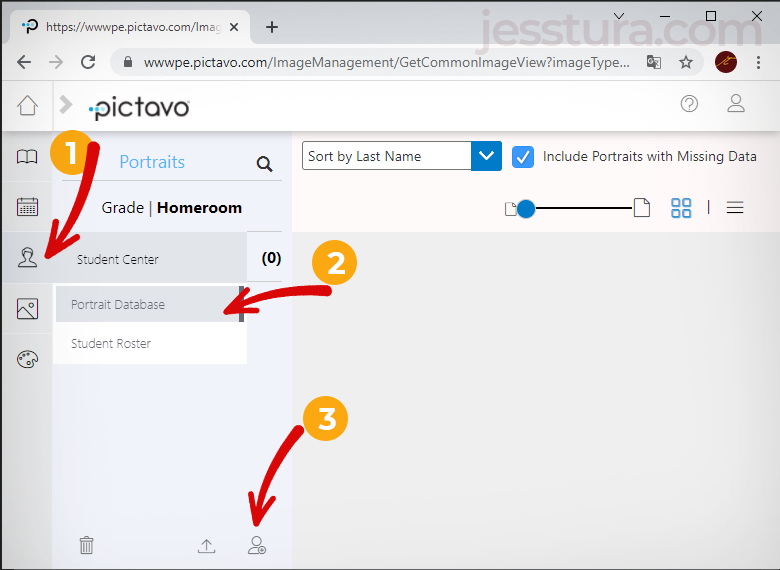
Step 1: Go to Student Center.

Step 2: Click Portrait Database > Add New Portrait
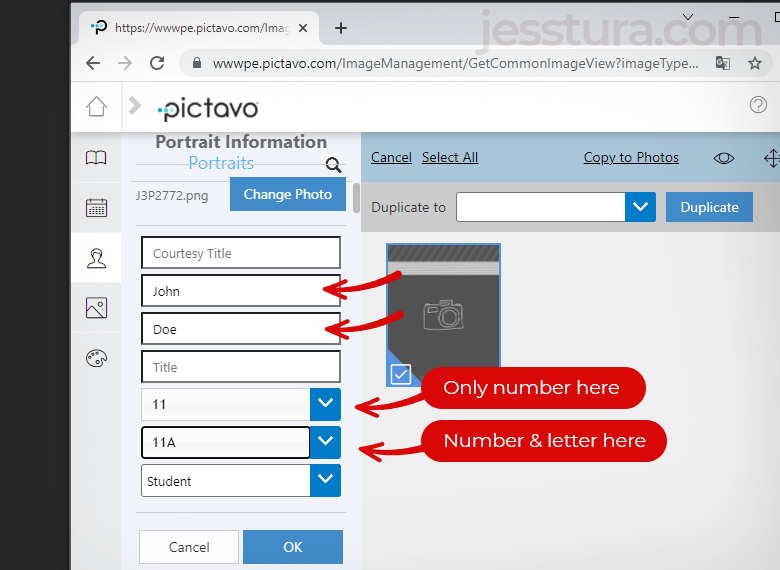
Step 3: Fill in the necessary information
Make sure to select the dummy portrait photo so that the fields to fill in will appear.
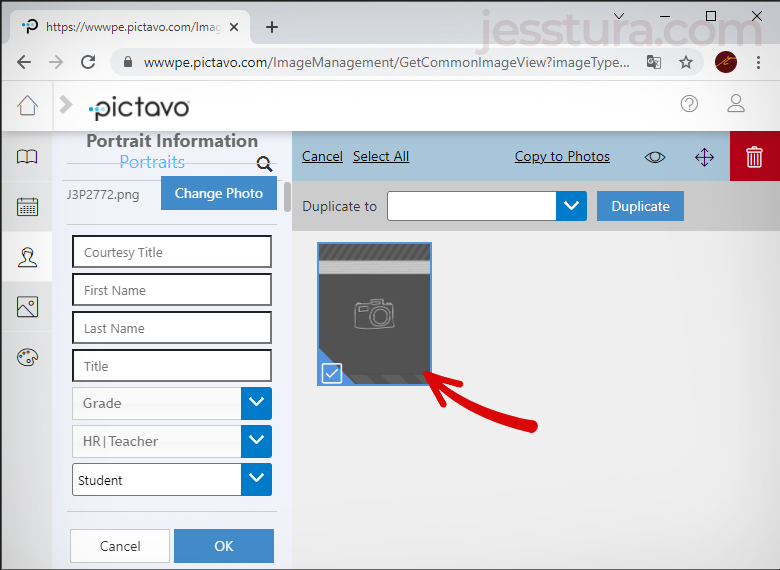
Only the following information are needed:
- Student portrait photo (we will add this later once its ready).
- First name and Lastname. If middle name is available, put it in the same field with first name.
- Put the grade number in the Grade field. For example, if a student is in Grade 11, then type 11 in the Grade field.
- Put the grade number and section letter in the HR | Teacher field. For example, if the student is in Grade 11 A, then type 11A. Notice that there’s no space.
- Leave the other fields, then click OK.
- Repeat these steps until you finish adding students record assigned to you.