We do not put things randomly anywhere inside our closet. We want our clothes to be organized. Inside our wardrobe or closet, we have boxes or areas where we put the socks separately with shorts, pants, shirts. The next time we need a pair of socks or shirt we know exactly where we can get it.
This is also true with our files and folders. With computers and the Internet, sometimes we are working with photos, videos, documents, recorded voices, etc. We need to save these various files in a logical or meaningful way.
Click this post if you want to know how to make folders in Google Drive.
In this tutorial, we are going to make a Google Docs file inside a folder. We want to create this Google Docs file and save it to a folder named ‘GDocs’.
Step 1: Login to your Gmail and Open Google Drive.

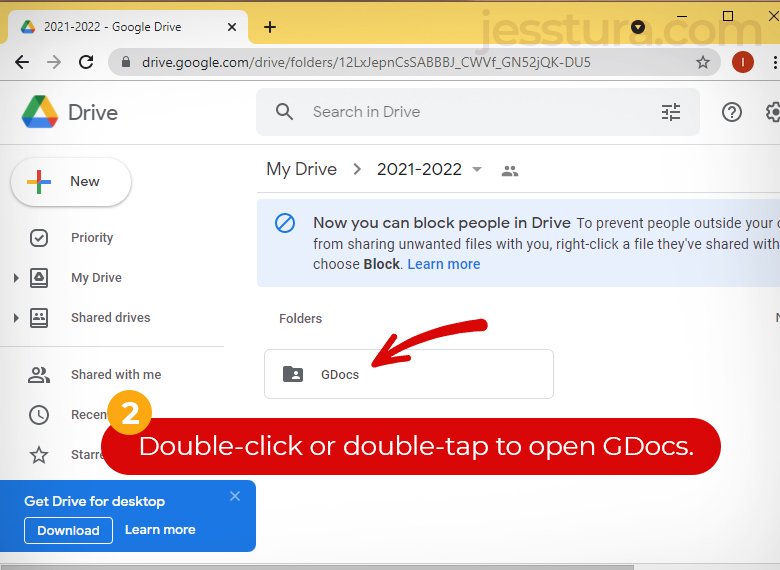
Step 2: Open the desired folder.
Once you are in your Google Drive, open the desired folder by double-clicking it or double-tapping it.
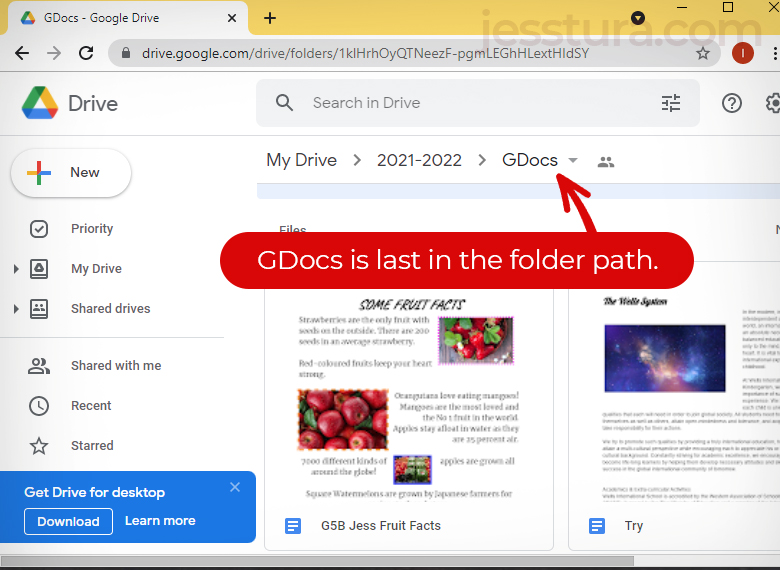
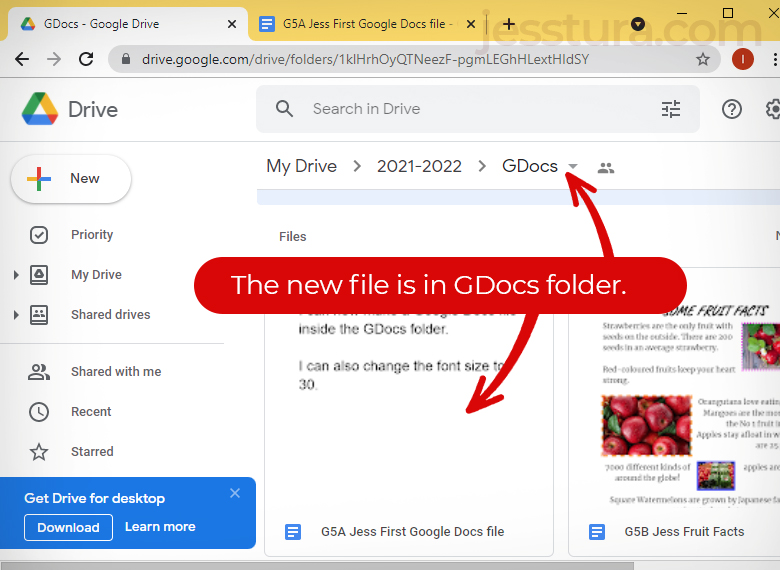
You will know that you are inside a folder if you can see the folder name as last in the folder path as shown below. On this example, I am now inside the ‘GDocs’ folder.
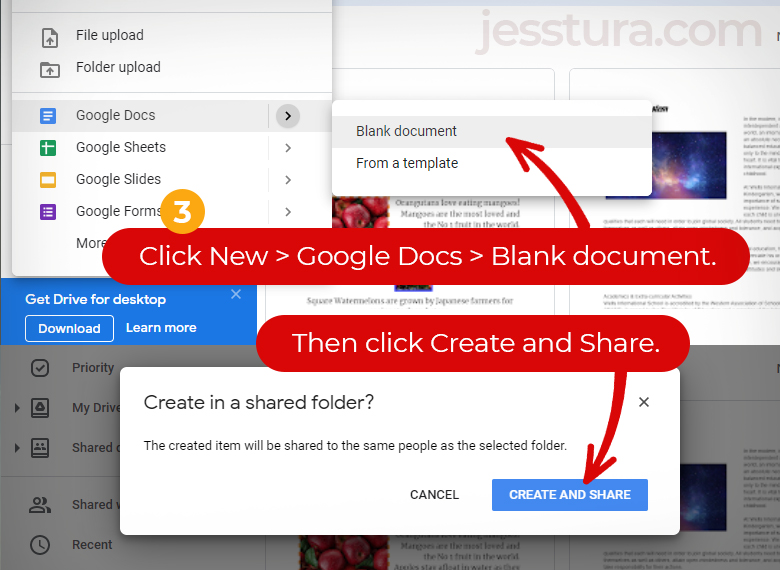
Once you are in the desired folder, you are now ready to make a new file. For this example, we will make a Google Docs file.
Step 3: Click the colorful Plus sign, then click Google Docs.
Step 4: Give your work a filename.
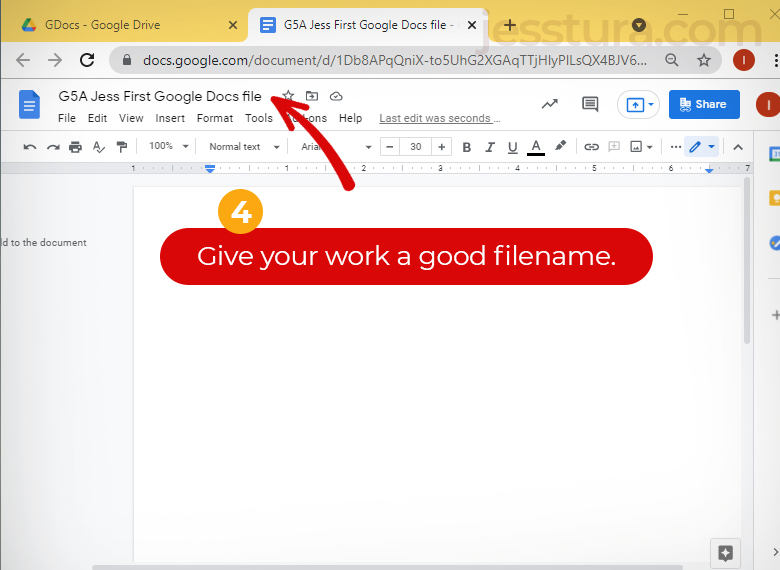
Do not be tempted to type or write in the document right away. Always give your work a filename first. We do not want ‘Untitled Document‘ as the name of our work.
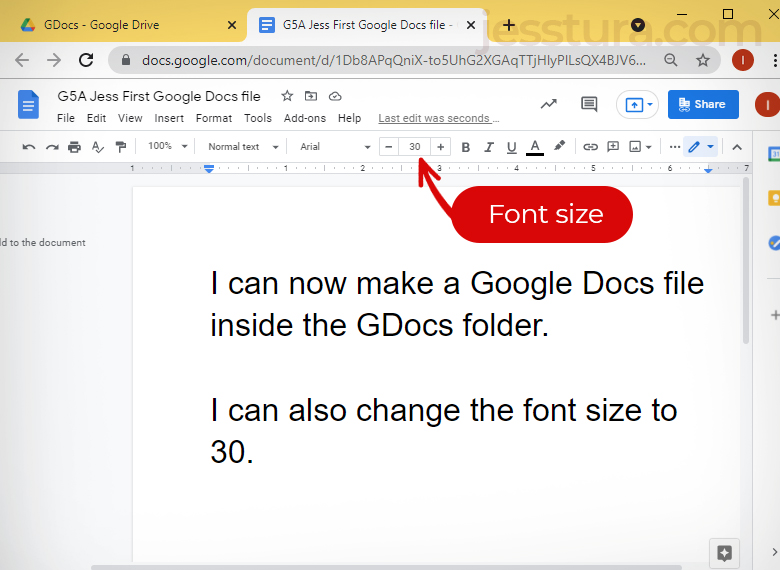
Step 5: Work with the content of your document.
Note: Google Docs saves your work automatically.
If you want to check if your new file is indeed inside the GDocs folder, all you need to do is go back to Google Drive and go inside the GDocs folder. You should be able to see the new file now.


One thought on “How to make a Google Docs file inside a folder?”